How workflows work
A workflow is a sequence of blocks that run one after another. Each block does one thing: navigate to a page, extract data, send an email, run custom code, loop, or branch. You connect blocks on a visual canvas, pass data between them, and run the whole chain with one click.How data flows between blocks
Every block produces an output. Downstream blocks reference it using the pattern{{ block_label_output }}.
For example, an Extraction block labeled scrape_listings produces output that later blocks access as {{ scrape_listings_output }}. The label is lowercased with spaces replaced by underscores, then _output is appended. This is how you chain steps together. One block’s output becomes the next block’s input.
Block categories
| Category | What it does | Examples |
|---|---|---|
| Browser Automation | Interact with web pages using AI | Browser Task, Browser Action, Extraction, Login, Go to URL, Print Page |
| Data and Extraction | Transform data without a browser | Text Prompt, File Parser |
| Control Flow | Branch, loop, validate, or pause | Loop, Conditional, AI Validation, Code, Wait |
| Files | Download and upload files | File Download, Cloud Storage Upload |
| Communication | Send data to external services or humans | Send Email, HTTP Request, Human Interaction |
Tutorial: Build a job listing tracker
Let’s build a real workflow. You’ll create an automation that finds the top 5 job listings from Hacker News’s monthly “Who is Hiring” thread, summarizes each one, and emails you a digest. This uses 5 blocks across 3 categories: browser automation, data and extraction, and communication.Create a new workflow
Go to Workflows in the left sidebar and click Create → Blank Workflow.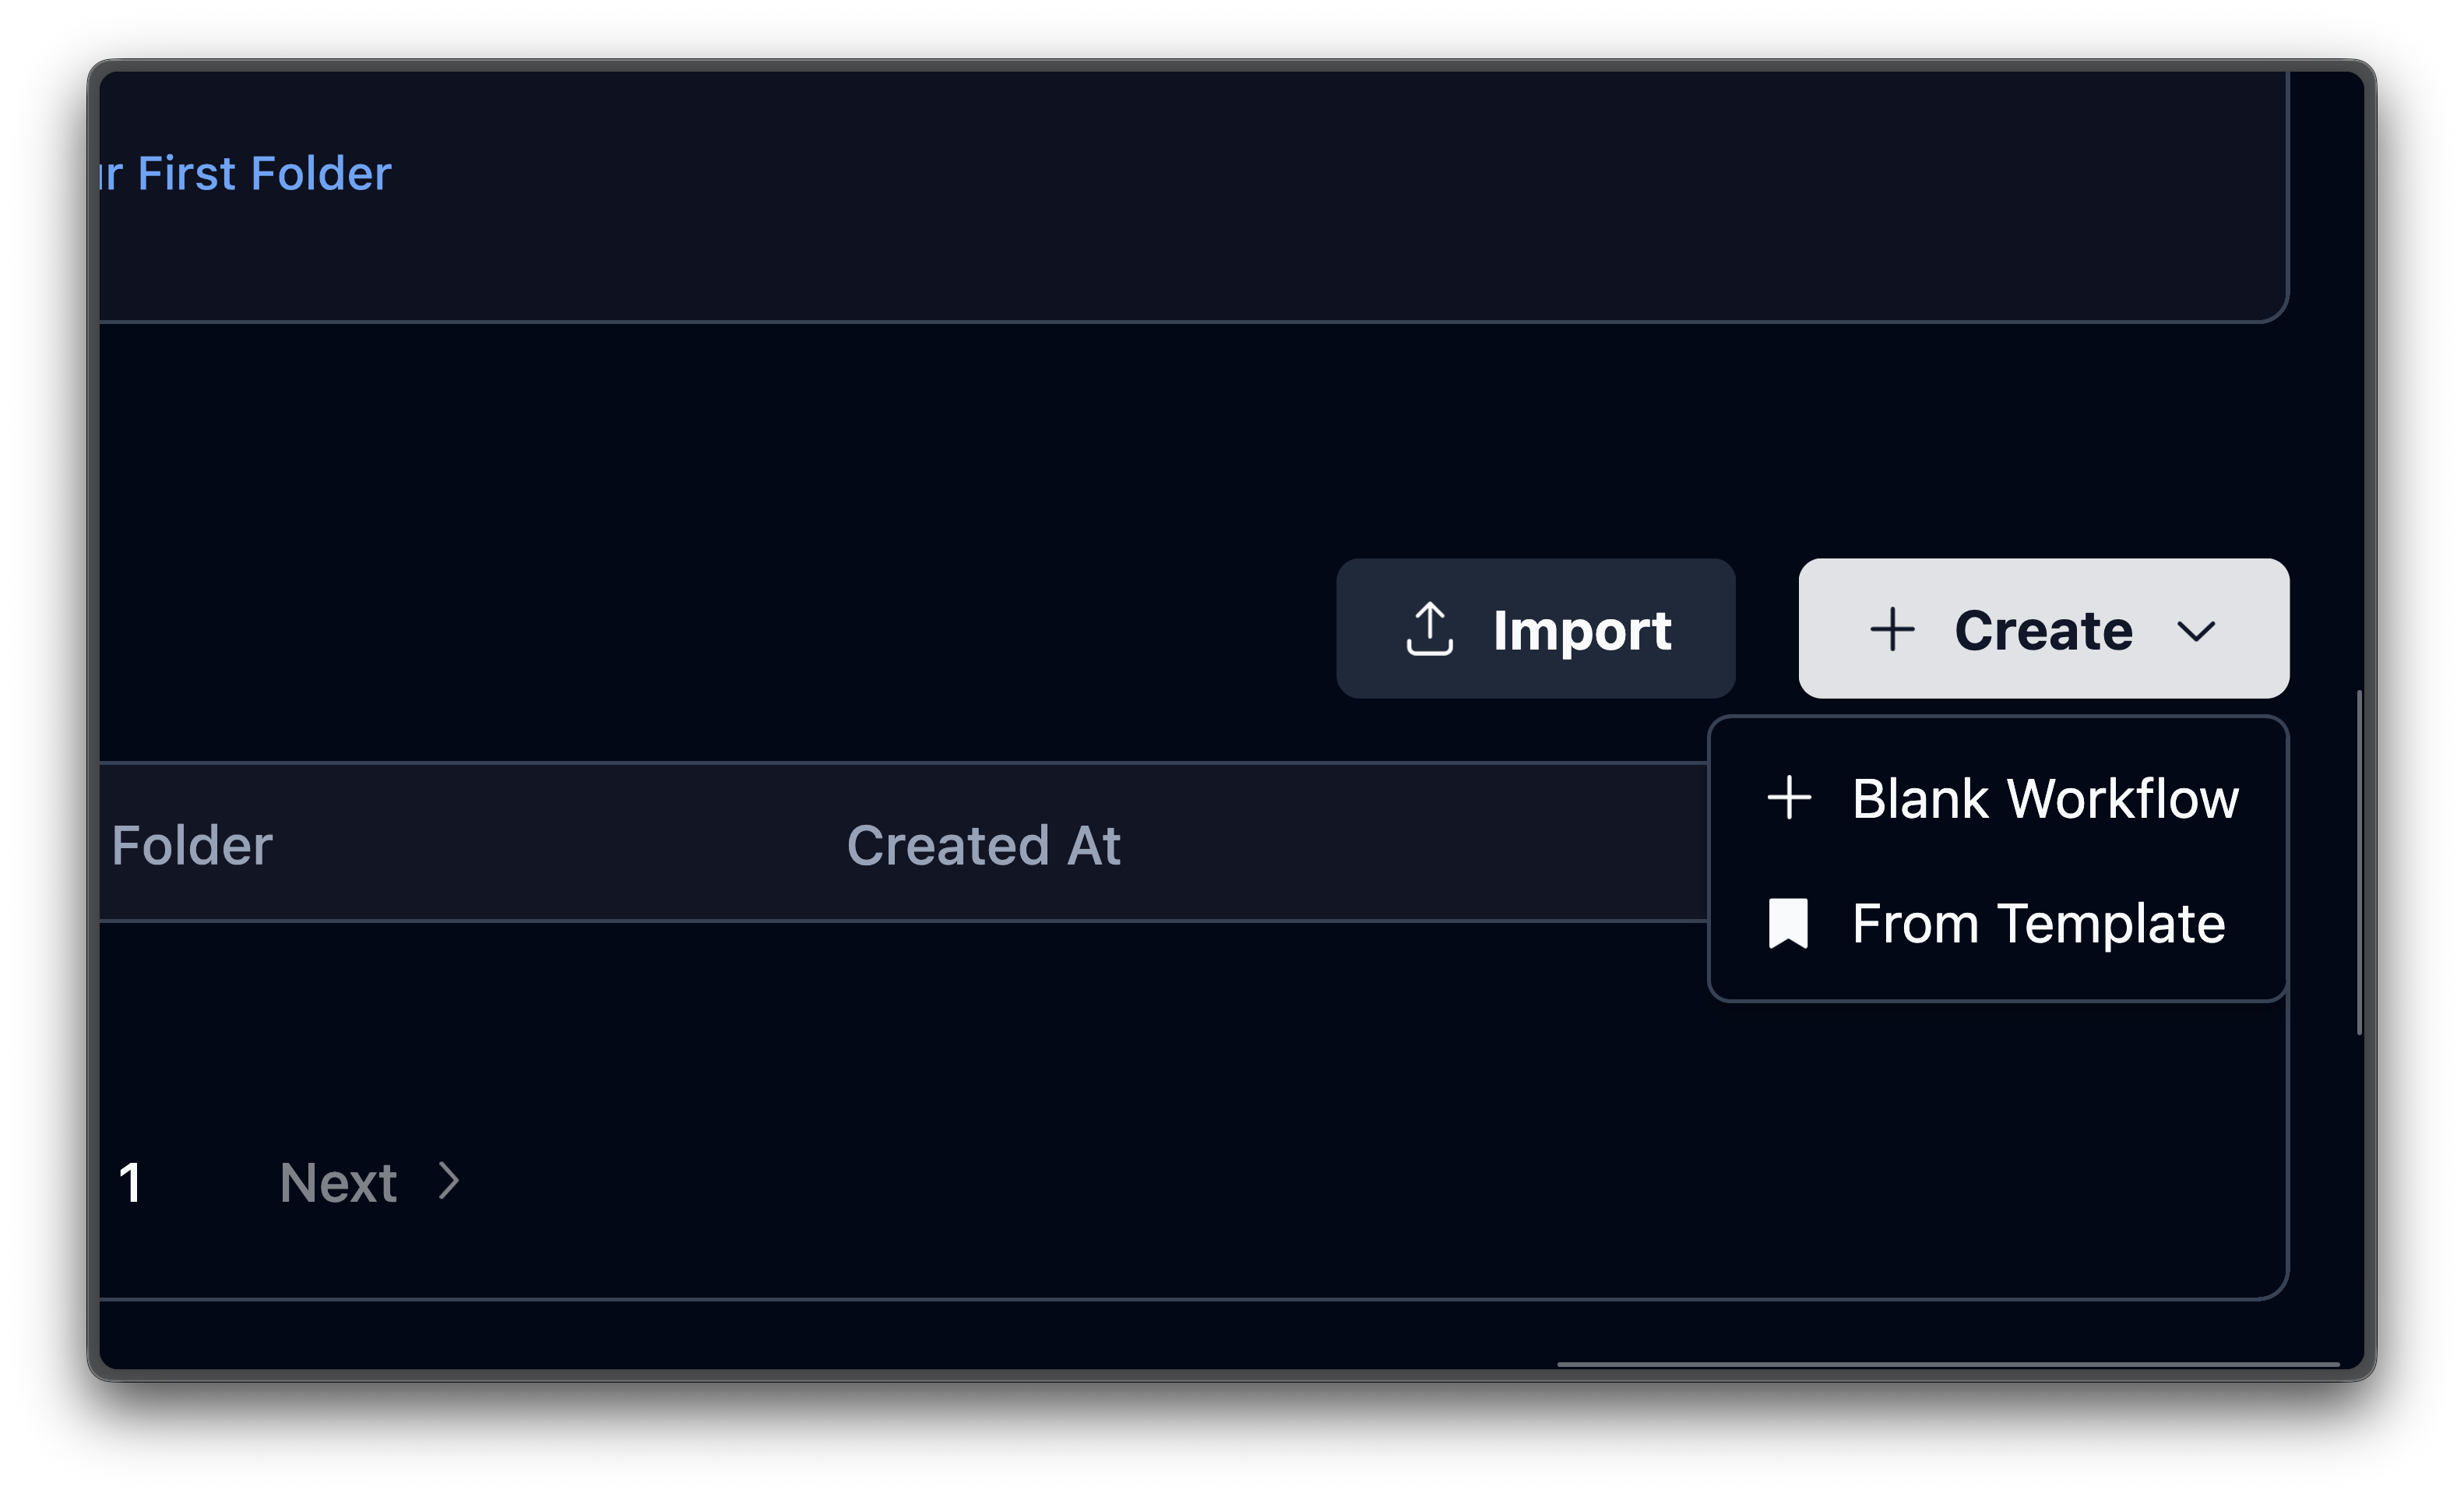
Add a Browser Task block
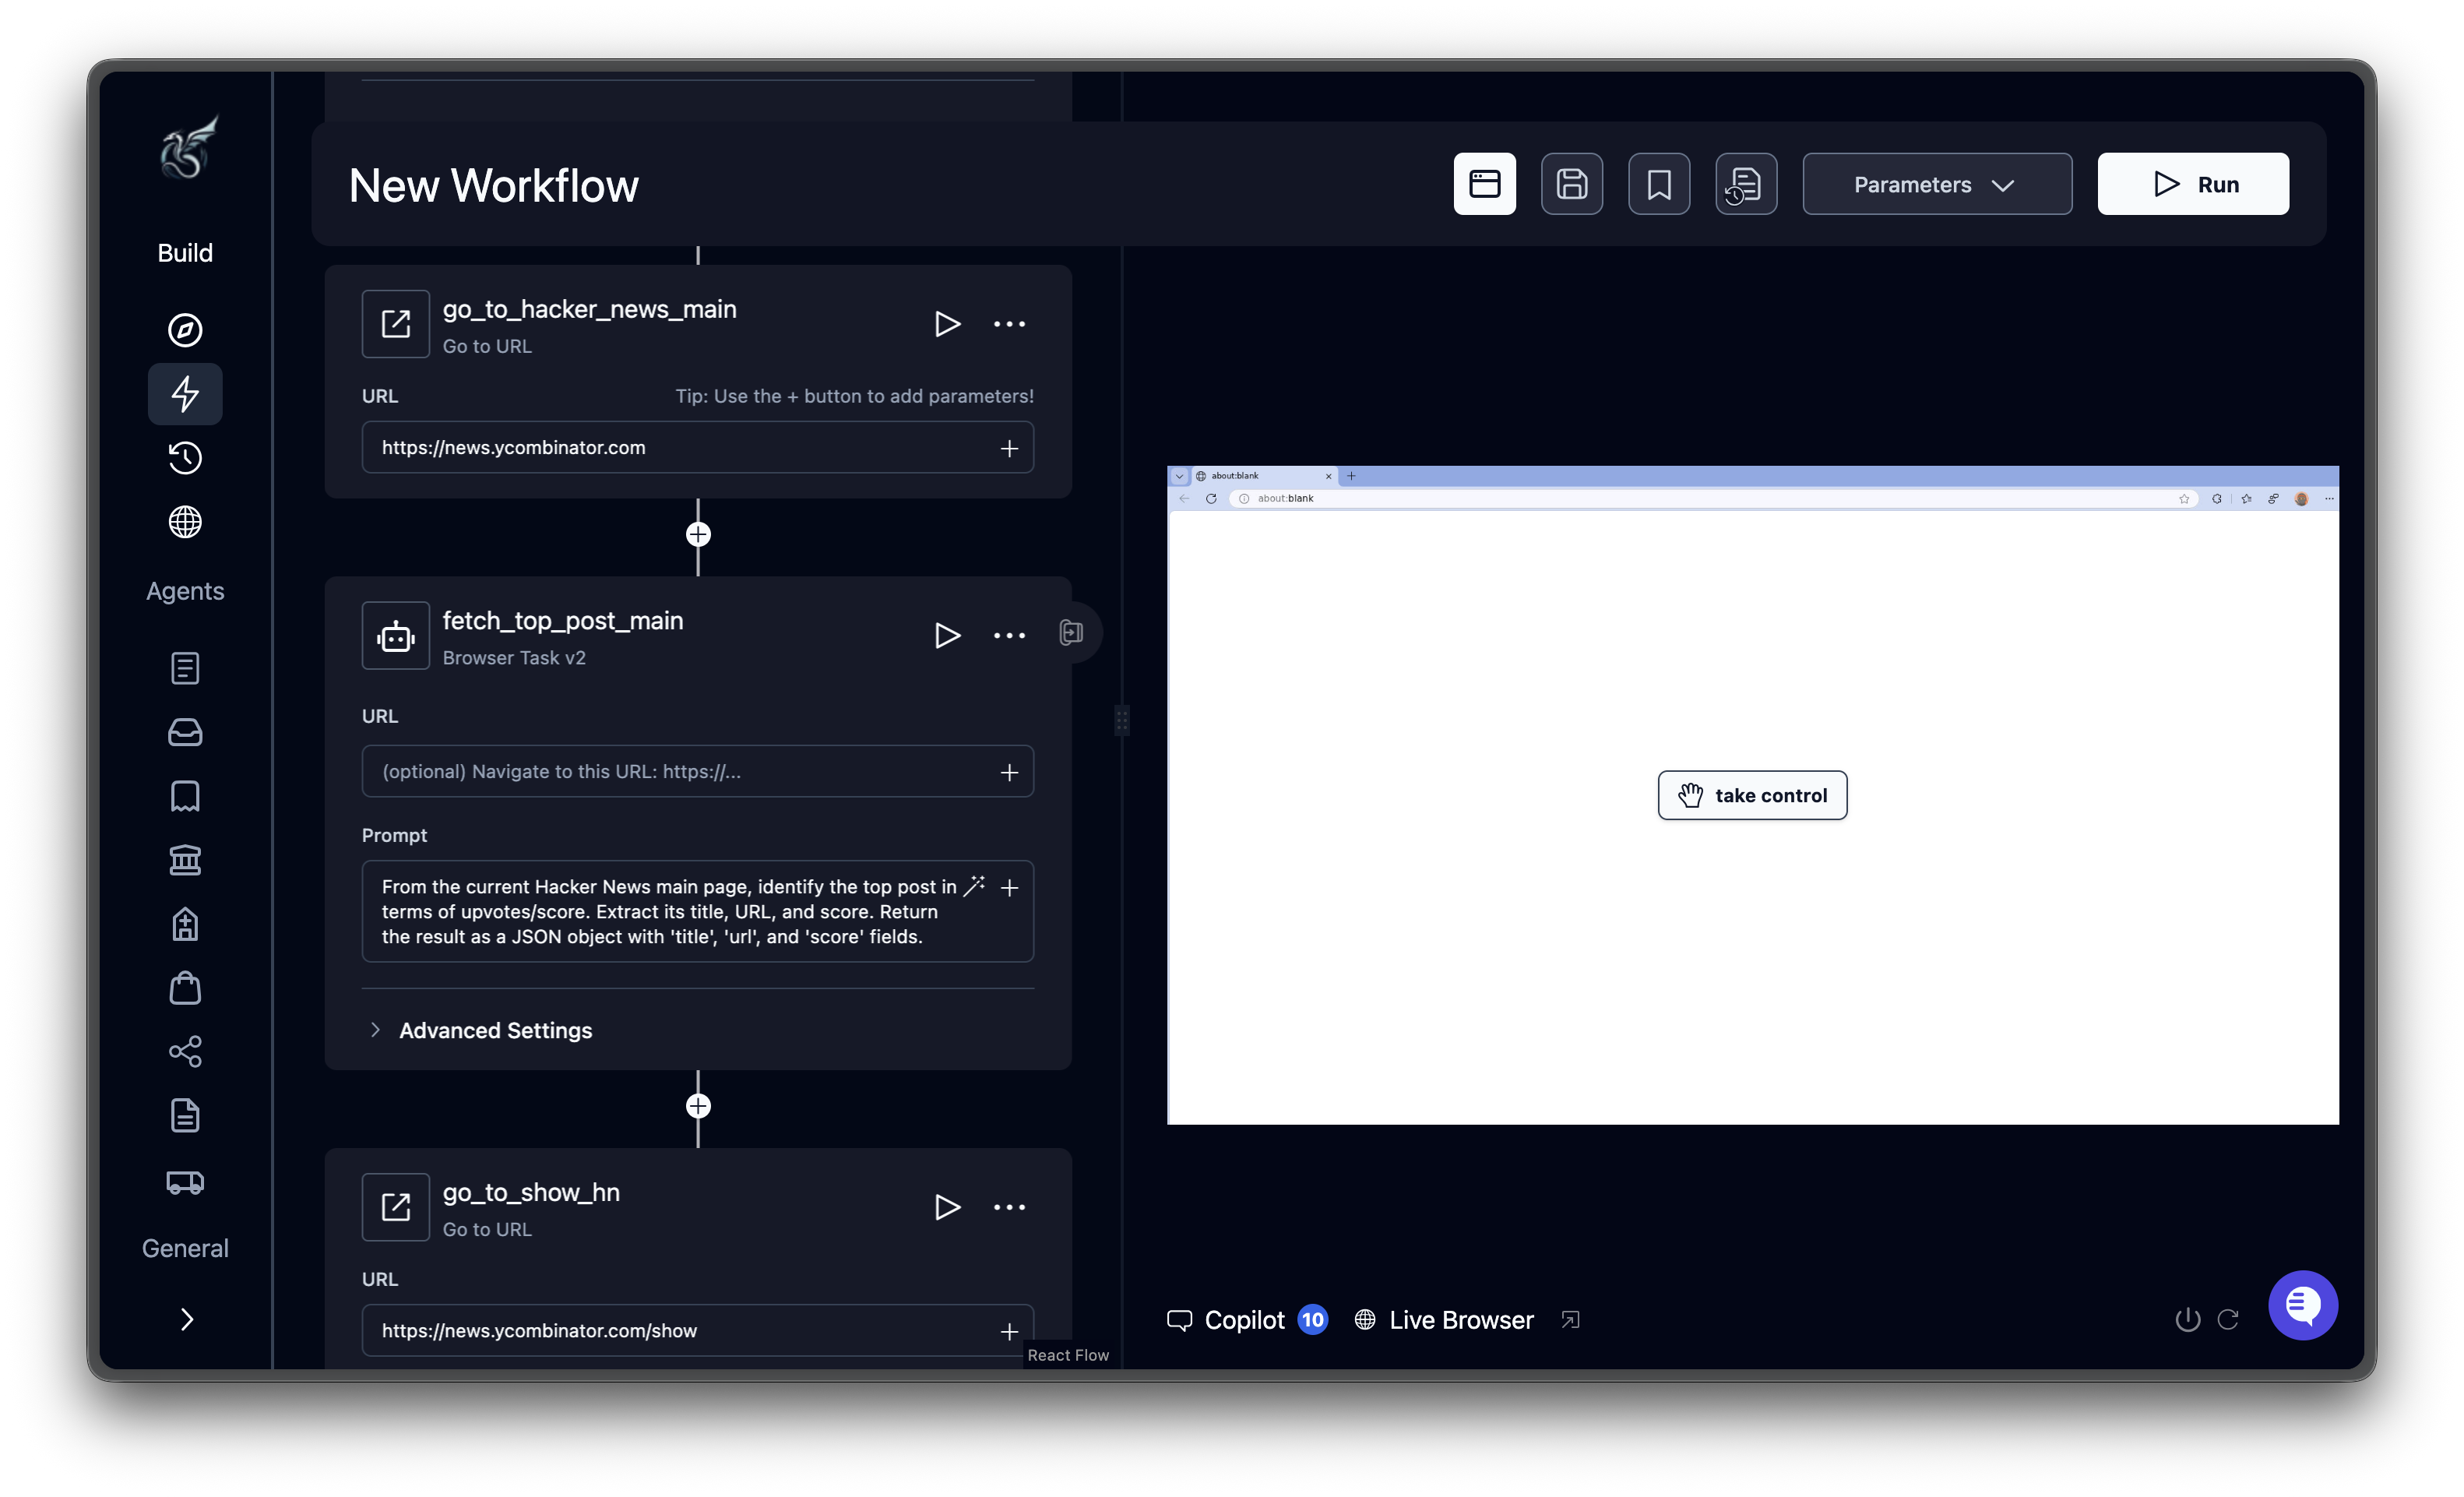
Hover over the + button on the edge below the start node and select Add Block. A searchable block library opens on the right. Find and select Browser Task Block.The block appears on the canvas with a configuration panel on the right. Fill in:
The Browser Task block uses AI to navigate the page and accomplish the goal described in your prompt. Include your success criteria directly in the prompt so the AI knows when it’s done.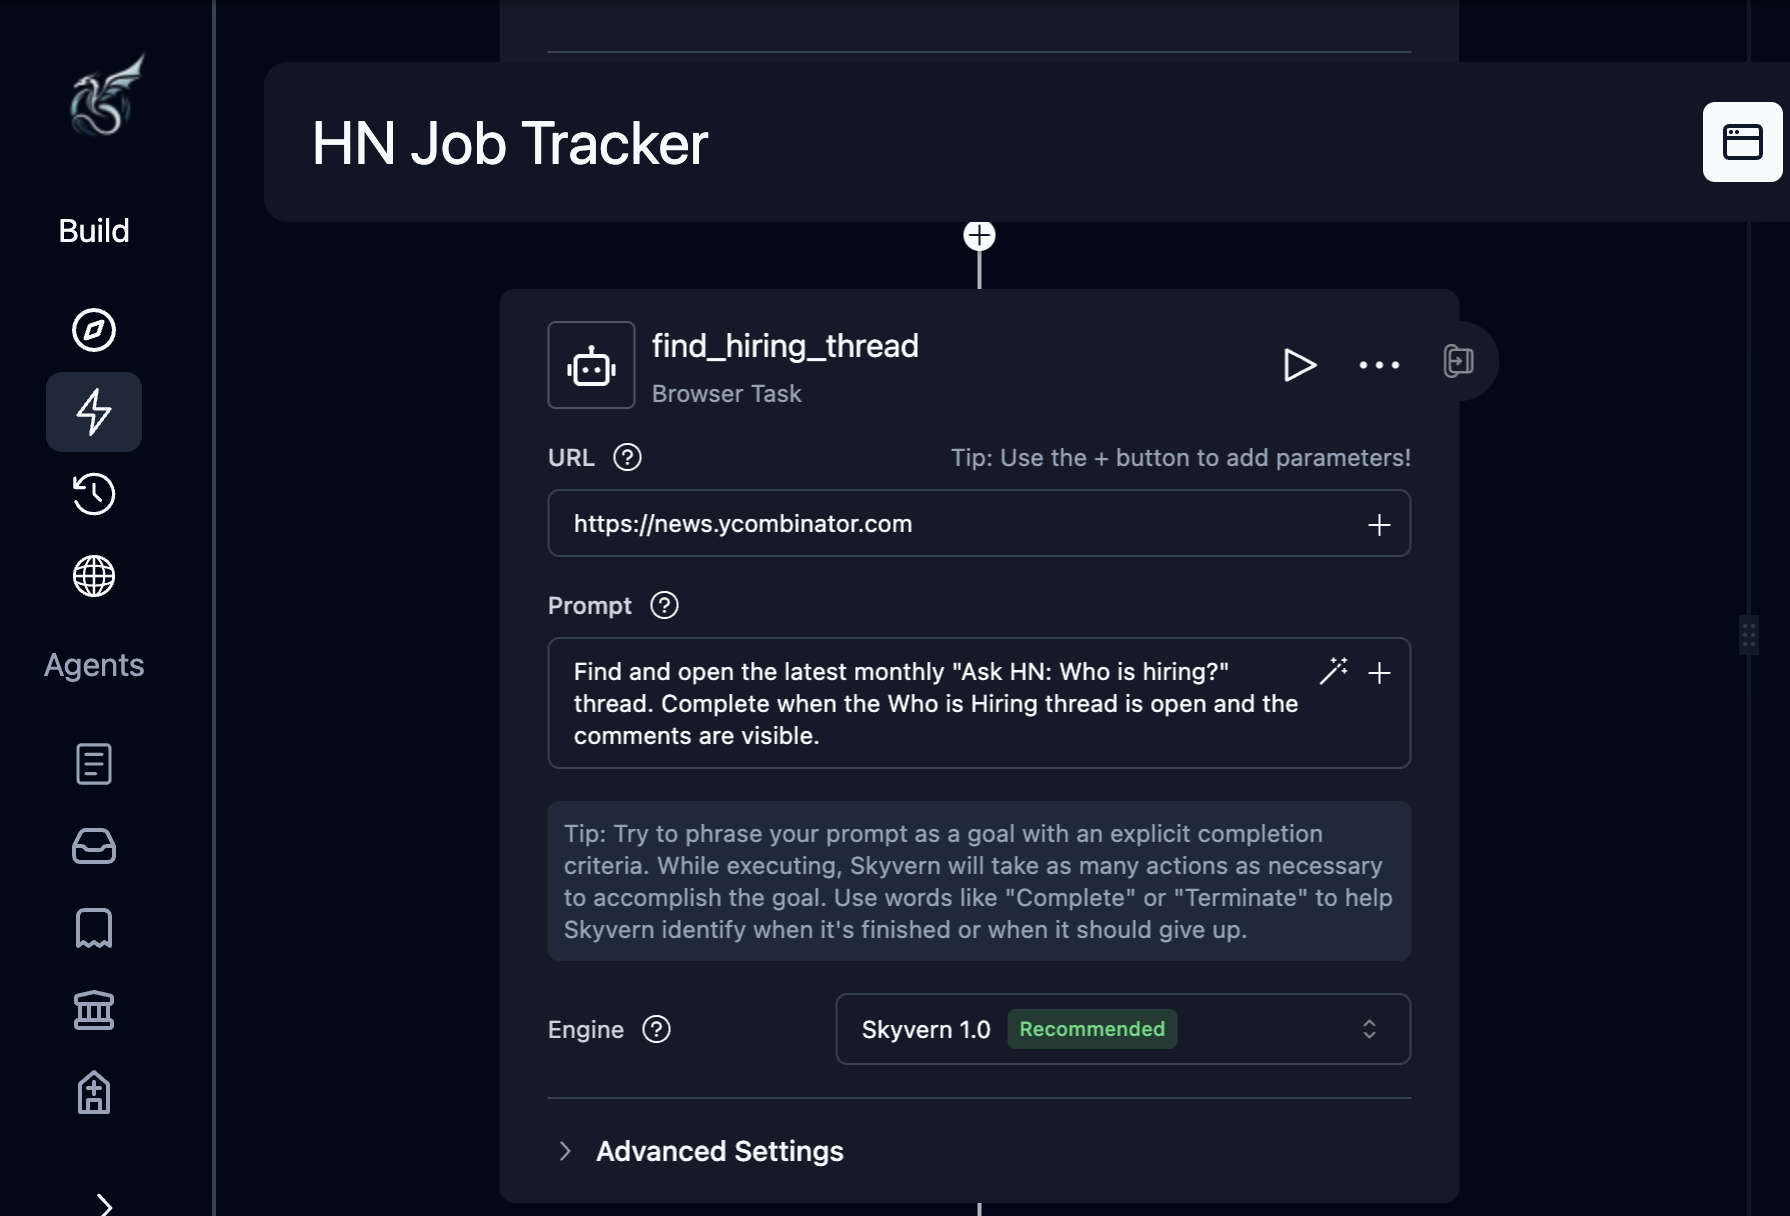
| Field | Value |
|---|---|
| Label | find_hiring_thread |
| URL | https://news.ycombinator.com |
| Prompt | Find and open the latest monthly "Ask HN: Who is hiring?" thread. The task is complete when the thread is open and job listing comments are visible. |
Why Browser Task instead of Go to URL?
Why Browser Task instead of Go to URL?
The URL for the latest hiring thread changes every month. The Browser Task block uses AI to find the right link on the page. Use Go to URL when you know the exact destination URL upfront.
Add an Extraction block
Hover over the + on the edge after
Now enable the Data Schema checkbox to reveal the JSON editor, and paste:The schema tells Skyvern exactly what structure to return. Without it, the AI picks its own format. You can also click Generate with AI next to the schema field to have Skyvern suggest a schema based on your extraction goal.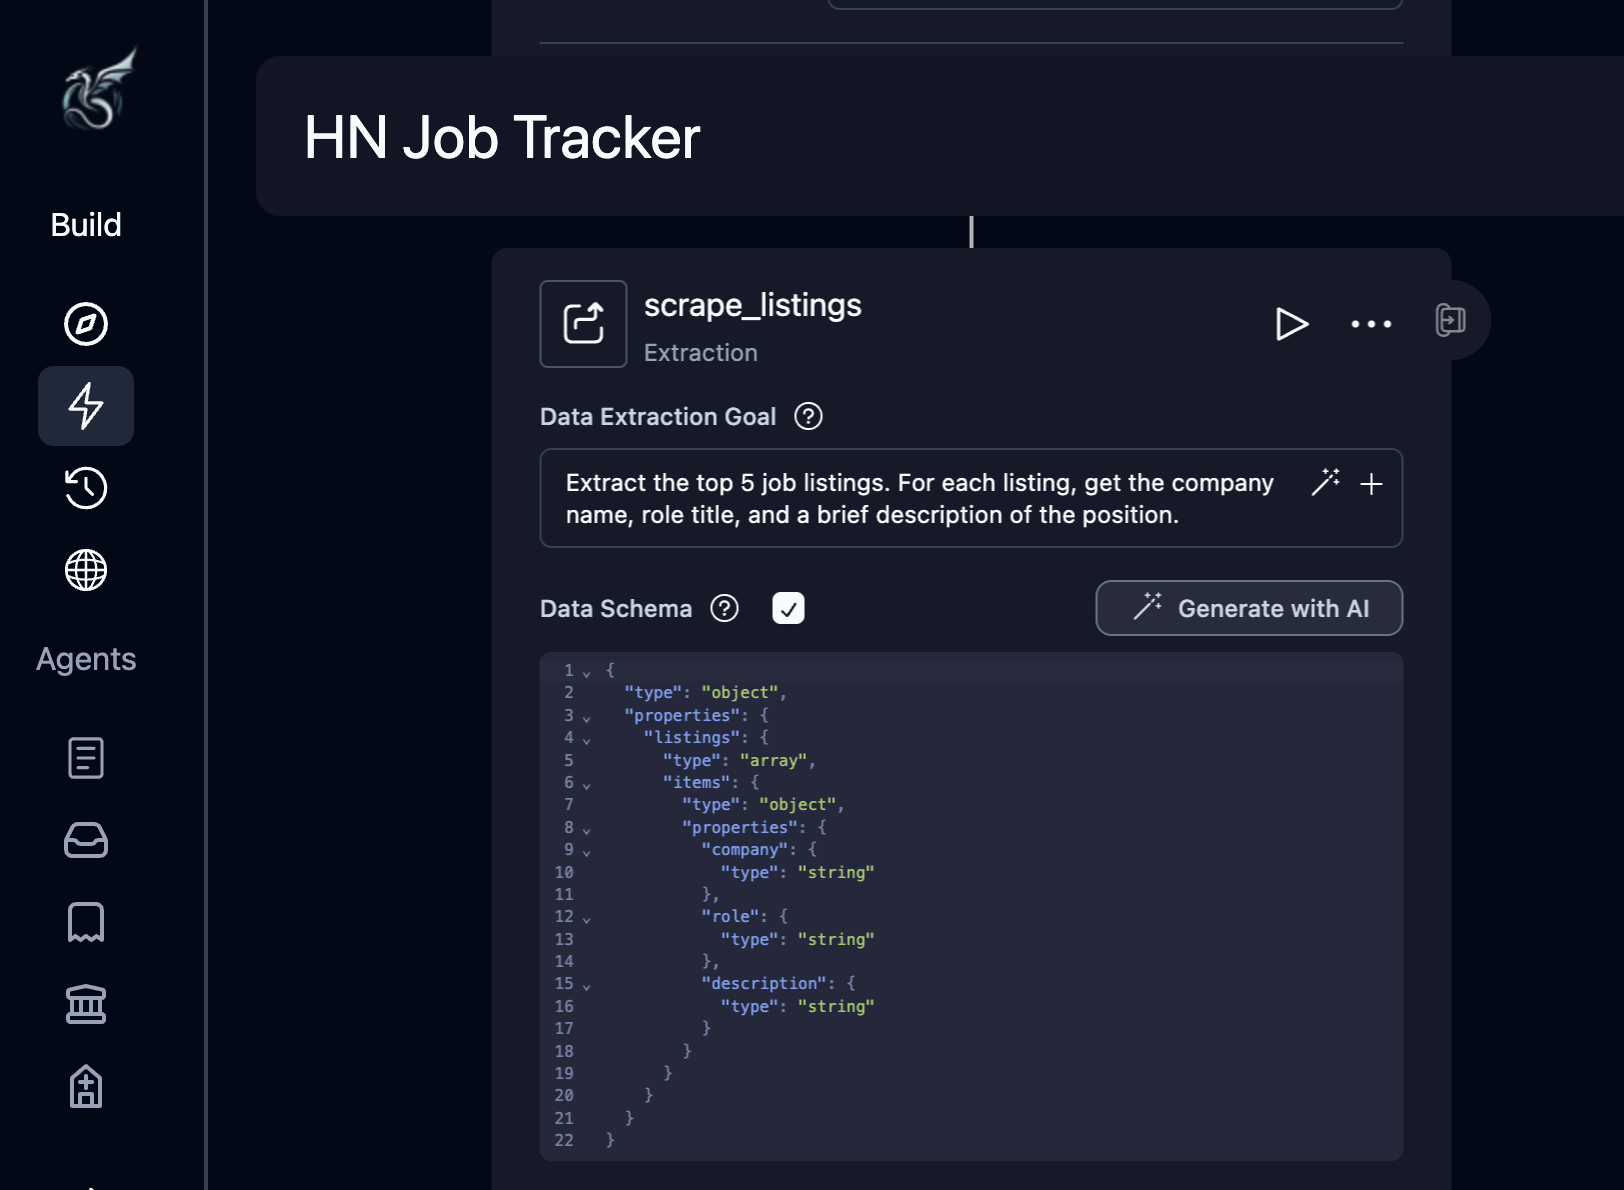
find_hiring_thread, select Add Block, then choose Extraction Block.Configure:| Field | Value |
|---|---|
| Label | scrape_listings |
| Data Extraction Goal | Extract the top 5 job listings. For each listing, get the company name, role title, and a brief description of the position. |
Add a Loop with a Text Prompt inside
Hover over the + after
This iterates over the 5 listings extracted in the previous step. Now add a block inside the loop. Hover over the + inside the loop body, select Add Block, and choose Text Prompt Block.Configure the Text Prompt:
Enable the Data Schema checkbox and paste:The Text Prompt block sends text to the LLM without opening a browser. It processes data only. Each iteration produces a one-line summary of that job listing.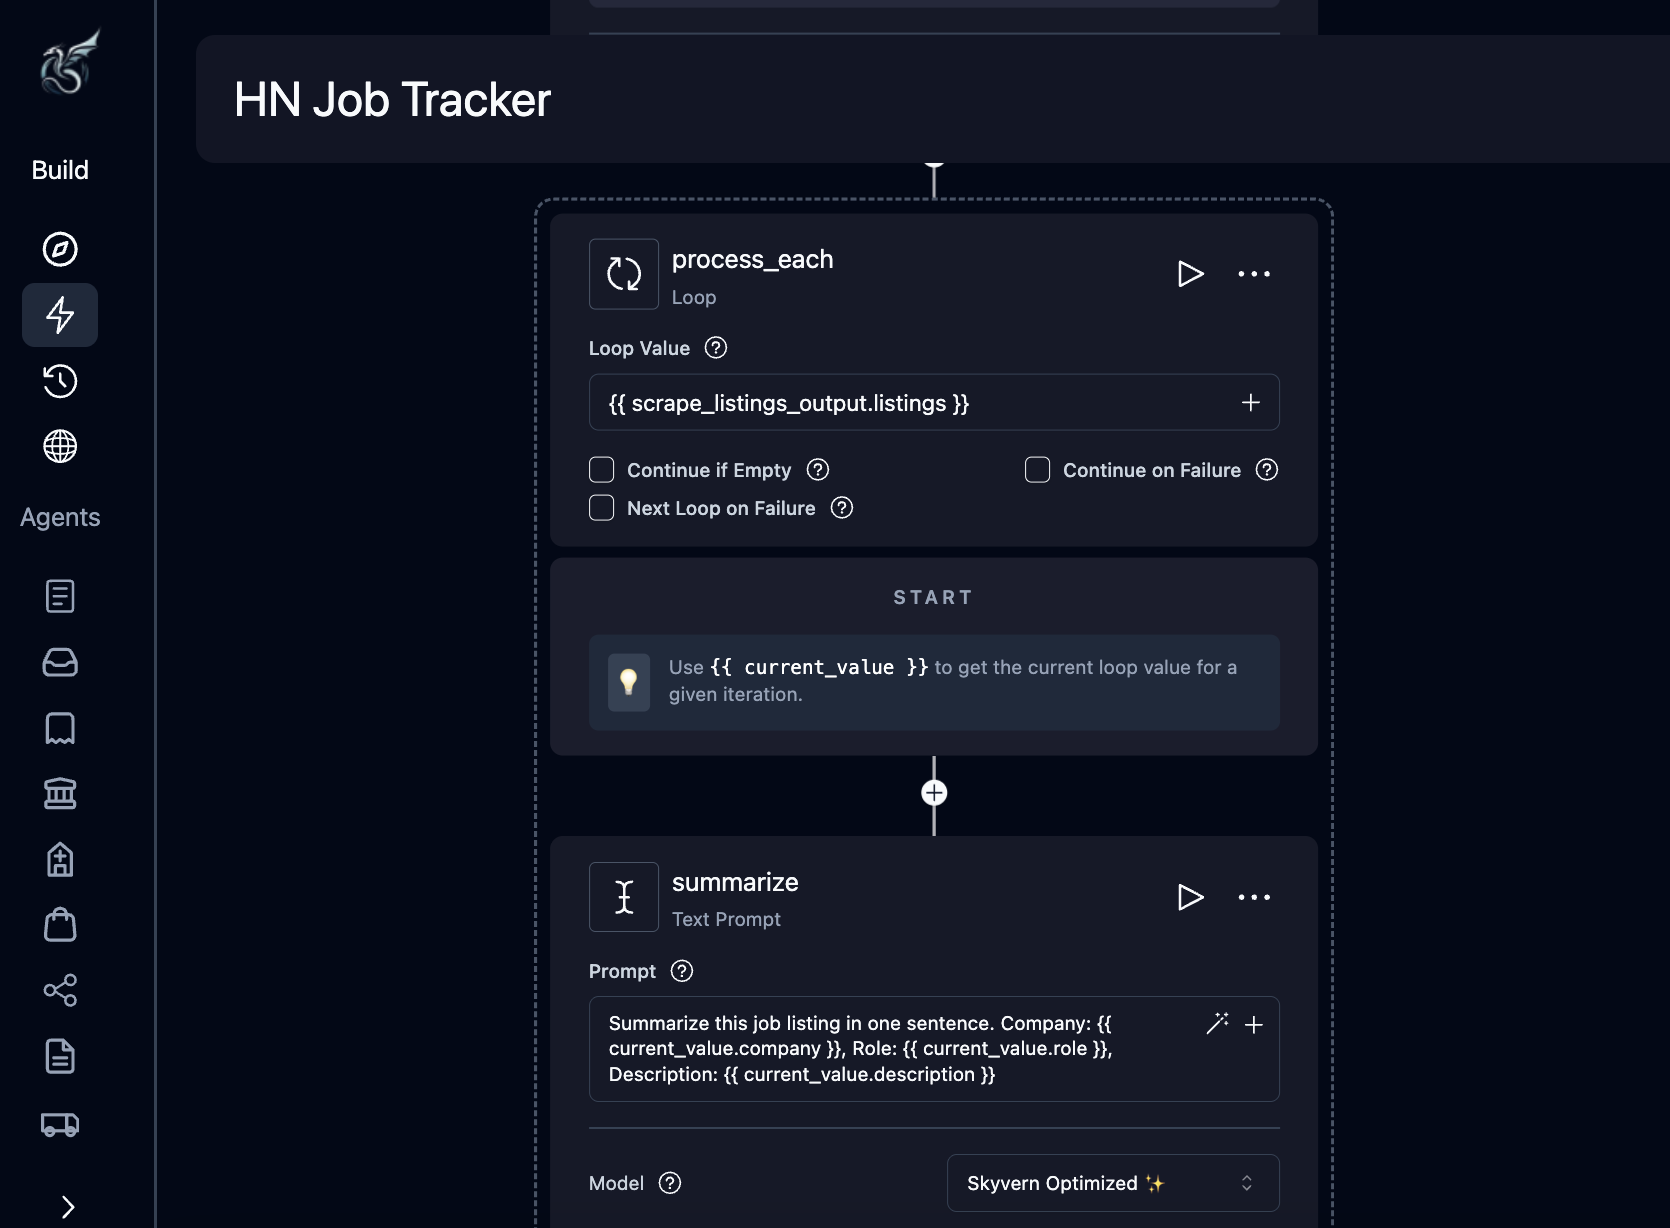
scrape_listings, select Add Block, then choose Loop Block.Configure the loop:| Field | Value |
|---|---|
| Label | process_each |
| Loop Value | {{ scrape_listings_output.listings }} |
| Field | Value |
|---|---|
| Label | summarize |
| Prompt | Summarize this job listing in one sentence. Company: {{ current_value.company }}, Role: {{ current_value.role }}, Description: {{ current_value.description }} |
What are current_value and current_index?
What are current_value and current_index?
Inside a loop, two reserved variables are available:
{{ current_value }}: the current item from the list being iterated{{ current_index }}: the item’s position, starting from 0
{{ current_value.company }} gives you the company name for the current listing.Add a Send Email block
Hover over the + on the edge after the loop (back on the main flow, not inside it), select Add Block, then choose Send Email Block.Configure:
The
| Field | Value |
|---|---|
| Label | send_digest |
| Recipients | Your email address |
| Subject | HN Job Digest - Top 5 Listings |
| Body | Here are today's top job listings from Hacker News:\n\n{{ process_each_output }} |
{{ process_each_output }} reference pulls in the collected summaries from every loop iteration.Save and run
Click Save, then click Run in the top right. A parameters page opens where you can review and confirm the workflow’s settings. Click Run Workflow to start execution.The live execution view opens. Watch as Skyvern navigates Hacker News, extracts listings, summarizes each one, and sends your email.
What you built
Five blocks, three categories, zero code. You can now re-run this workflow anytime, tweak the extraction schema to pull different fields, swap the email for an HTTP Request to post to Slack, or add a Conditional block to only email when listings match certain criteria.Editor reference
Layout
| Area | What it shows |
|---|---|
| Header bar (top) | Workflow title (click to rename), Parameters button, Save button, Template toggle, History button, Run button |
| Canvas (center) | Visual graph of blocks connected in sequence. Zoom with the scroll wheel, pan by dragging the background. |
| Configuration panel (right) | Opens when you click a block. Shows that block’s settings form. |
Adding blocks
Hover over the + button on any edge (the connecting line between blocks) to reveal the menu. Select Add Block to open the block library, a searchable list of all available block types. Click a block to insert it at that position. The menu also offers Record Browser (record actions in a live browser to generate blocks) and Upload SOP (upload a PDF procedure to auto-generate a workflow). When you create a blank workflow, hover over the + on the start edge to add your first block.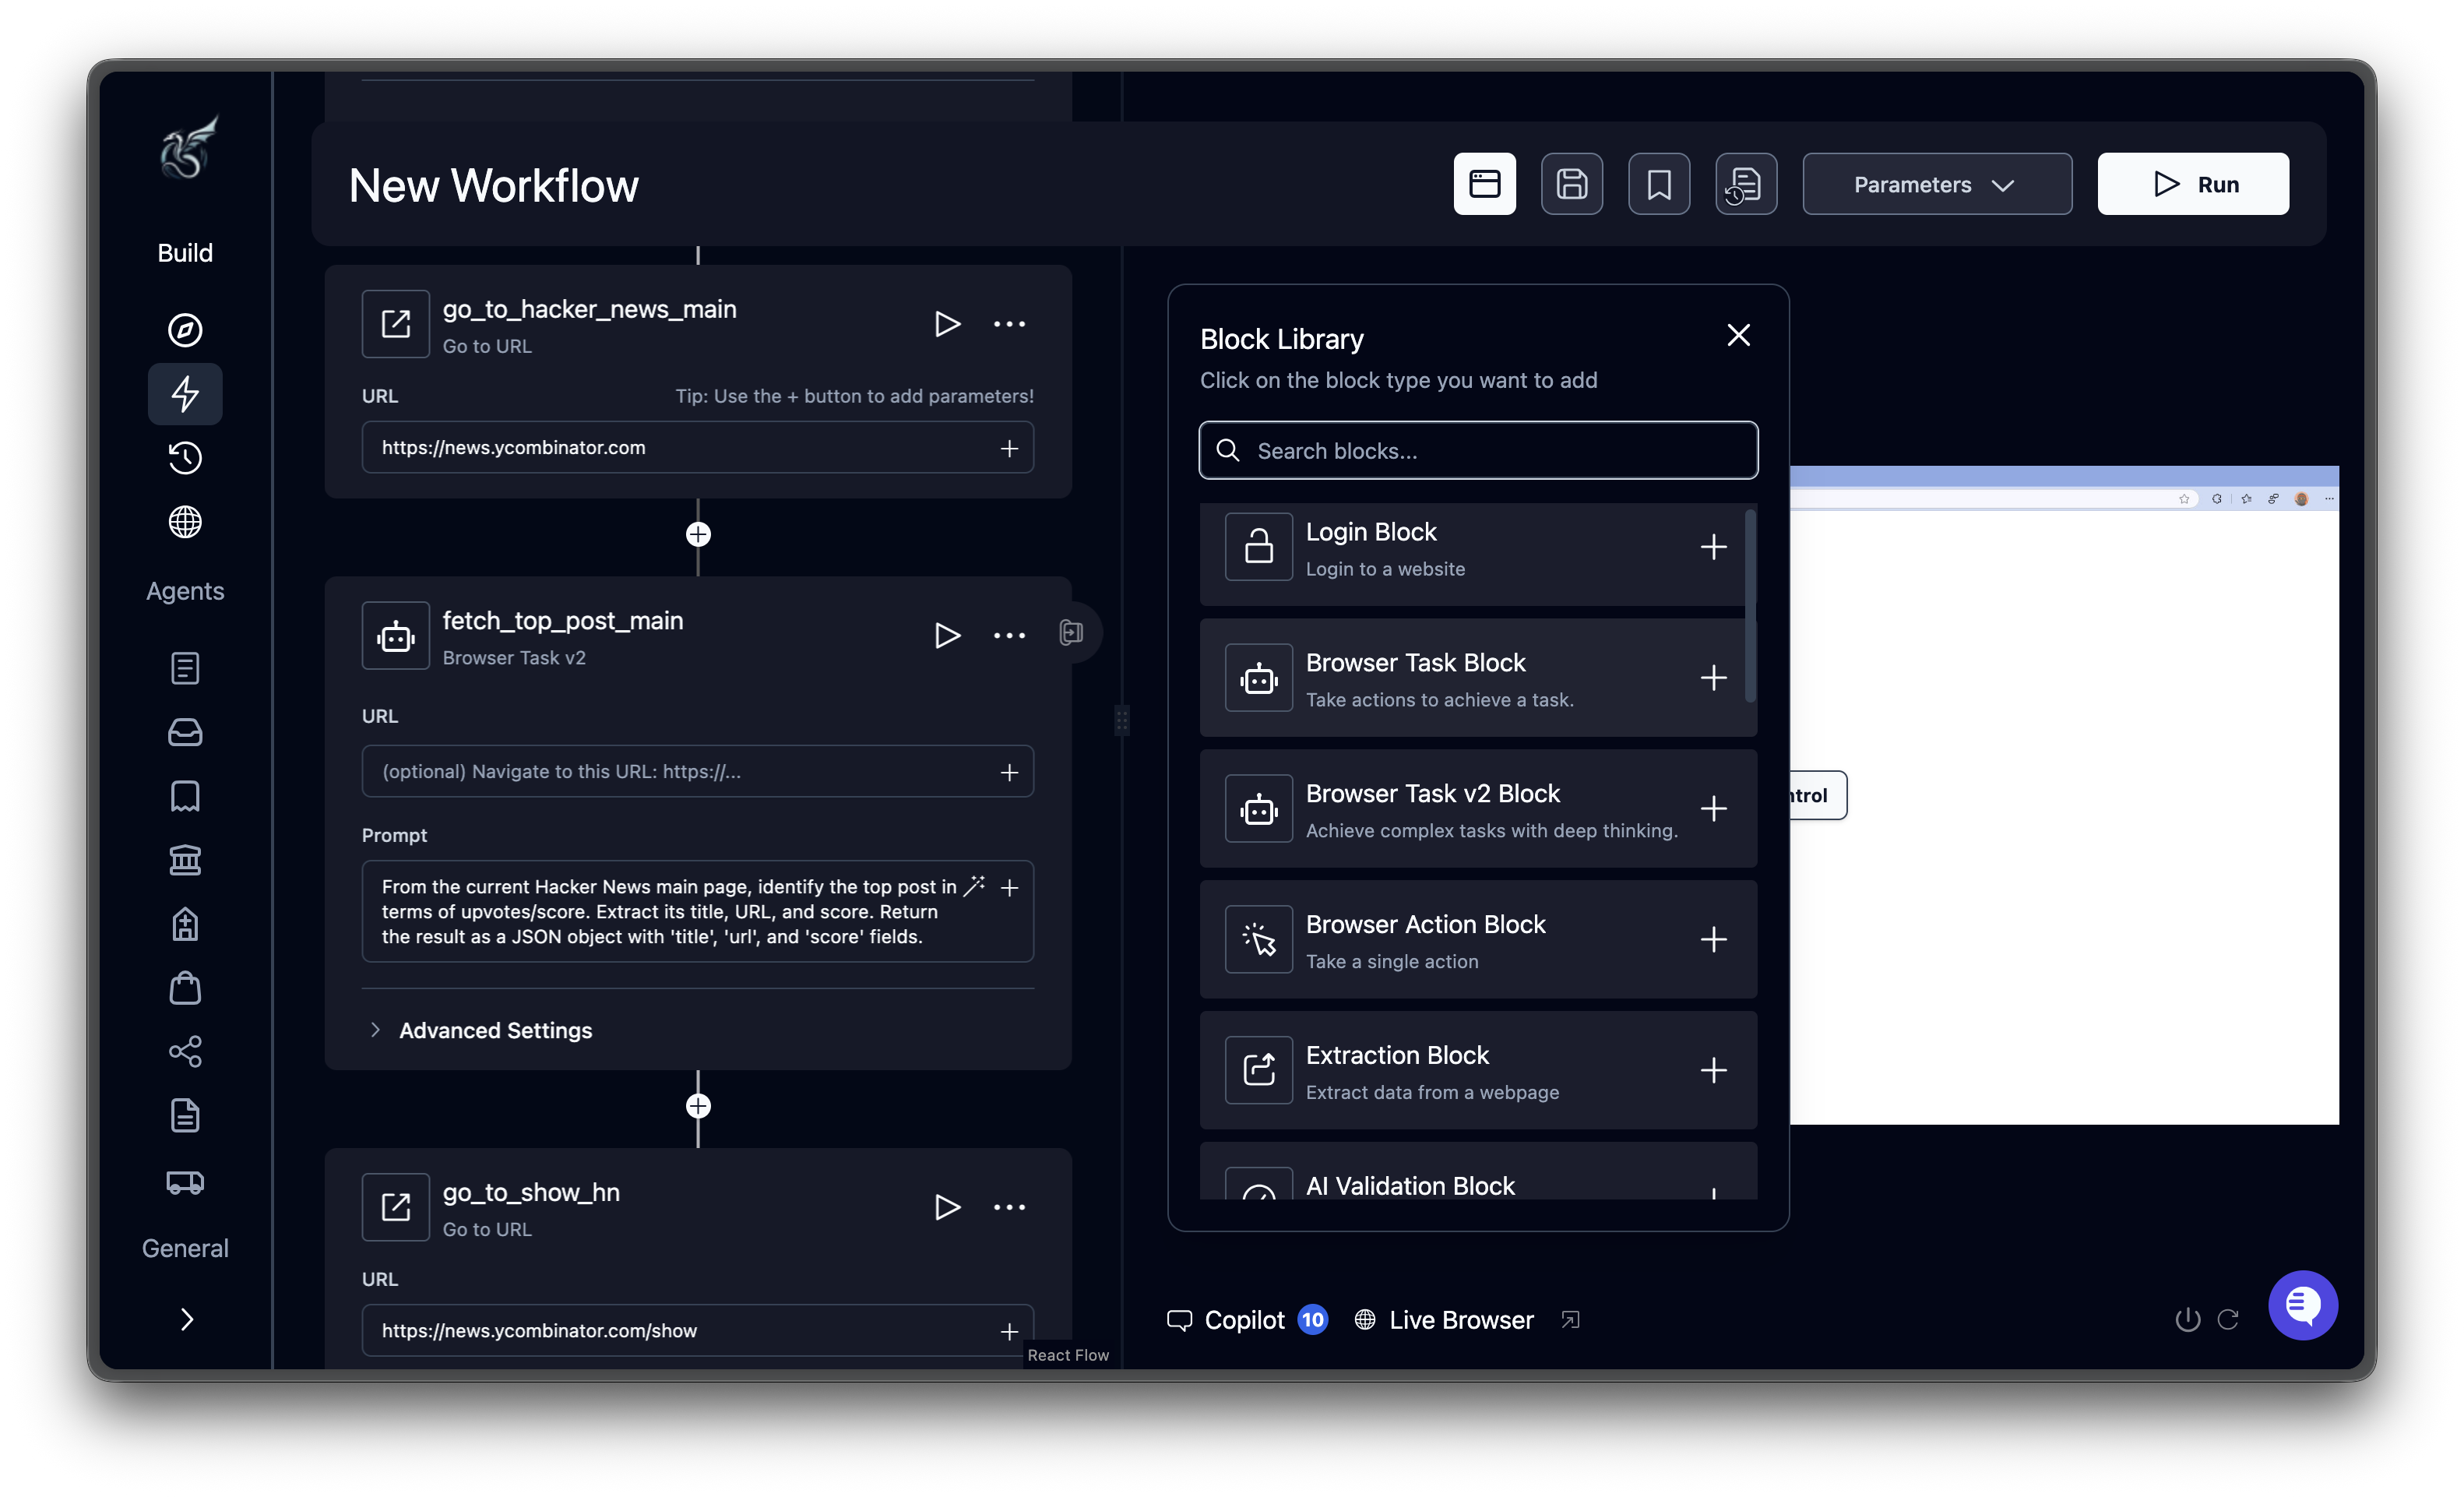
Configuring blocks
Click any block on the canvas to open its configuration panel on the right. Each block has a Label field (which determines its output variable name) and block-specific settings. Browser-based blocks share additional fields like URL, Engine, and Max Retries. See Block Reference for the full list of fields on each block type.Connecting and reordering blocks
Blocks auto-connect when you insert them via the + button. They execute top to bottom in the order shown on the canvas. Conditional blocks create branches. Each branch connects to a different sequence of blocks and merges back at a common point. Loop blocks contain child blocks that repeat for each item in the loop’s list. To reorder blocks, delete the block you want to move and re-add it at the desired position using the + button.Deleting blocks
Click the three-dot menu on a block’s header and select Delete Block. Downstream blocks reconnect to the previous block automatically.Saving
The Run button also saves before starting execution.Header bar actions
| Button | Description |
|---|---|
| Save (disk icon) | Save the current workflow definition |
| Template (bookmark icon) | Toggle whether this workflow is saved as an organization template |
| History (clock icon) | View past runs of this workflow |
| Parameters | Open the parameters panel (see Workflow Parameters) |
| Run (play icon) | Save and start a new execution (see Running Workflows) |
What’s next
Block Reference
Configuration fields for every block type
Add Parameters
Pass dynamic values into your workflows
Run Your Workflow
Execute workflows and track results